
I’ve learned the hard way that skipping planning derails projects fast—you need clear goals, realistic budgets, and a professional’s eye upfront. Build in a 15-20% contingency fund because hidden costs always pop up. Respect your work triangle (sink, stove, fridge shouldn’t exceed 26 feet), choose durable finishes over trendy ones, layer your lighting properly, and inventory what you’ll actually store before designing cabinets. Get these seven fundamentals right, and you’ll avoid regret while protecting your wallet—stick around to discover exactly how.
[link-whisper-related-posts]The #1 Kitchen Remodel Mistake: Skipping the Planning Phase

Why do so many kitchen remodels go sideways? I’ve learned it’s because we skip the planning phase entirely. I used to think I could wing it, but that approach costs time and money we don’t have to waste.
A solid plan defines your kitchen’s purpose and workflow, supporting how you actually cook and eat. You’ll establish a realistic budget upfront, preventing scope creep that derails projects. I consult with a professional designer early—they spot pitfalls I’d miss alone.
Your documented plan should include clear goals, detailed layout, and timelines. This roadmap guides you from start to finish, keeping everyone aligned. Investing a few weeks in planning prevents months of regret and unexpected expenses.
Budget for Surprises: Don’t Underestimate Costs and Contingencies

How many kitchen remodels have derailed because of hidden costs nobody saw coming? I’ve learned that building a solid budget with generous contingencies isn’t just smart—it’s necessary. You’ll want to account for materials, labor, permits, and unexpected surprises that inevitably pop up.
Here’s what I do: I create a detailed budget first, then add a dedicated contingency fund—typically 15-20% of your total project cost. This cushion absorbs measurement errors, material price fluctuations, and scope changes. I track every expense against my plan, adjusting promptly to prevent overruns.
Working with a professional designer helps you anticipate pitfalls before they become expensive problems. Together, you can identify potential issues with appliance sizing and accessory needs, building cost buffers strategically. Planning ahead saves you stress and money down the road.
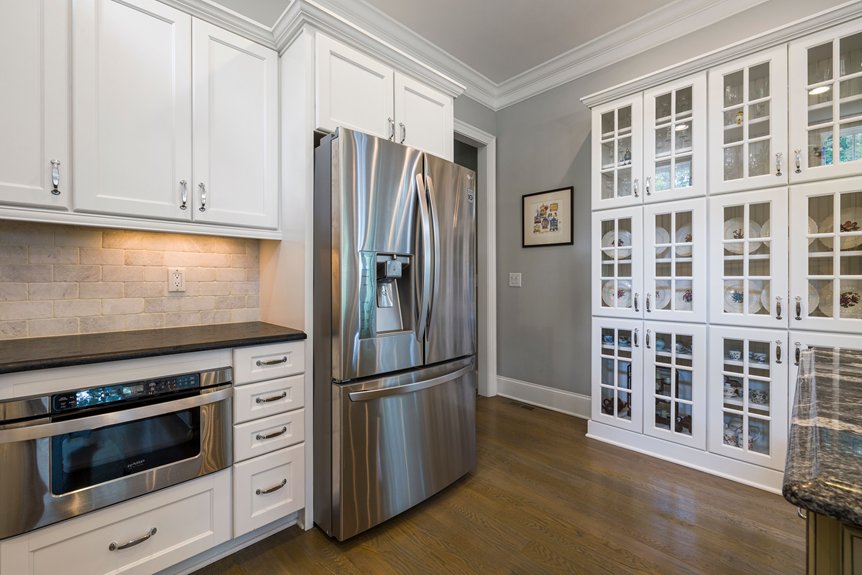
Honor the Work Triangle and Kitchen Workflow

Ever notice how some kitchens feel effortless while others leave you frustrated and exhausted? That’s your work triangle at play. I learned this the hard way—ignoring the connection between my sink, stove, and refrigerator created annoying chokepoints that turned simple meals into obstacle courses.
Your work triangle shouldn’t exceed 26 feet total. Keep these three stations positioned so you’re not constantly backtracking. When you plan layouts, add prep space between each node. An island or blocking cabinetry can damage your kitchen workflow faster than you’d think.
During renovations, revisit this triangle constantly. Ask yourself: Can doors open without creating traffic jams? Do I have clear pathways? Honoring this principle makes your kitchen less draining and more practical, making daily cooking feel genuinely enjoyable rather than exhausting.
A Costly Kitchen Remodel Mistake: Choosing Finishes That Won’t Last

Somewhere between “this looks good right now” and “why does my kitchen feel dated already?” lies a trap that catches most homeowners—picking finishes based on what’s trendy instead of what’ll actually last.
I’ve learned that kitchen finishes deserve serious thought. Consider these smart moves:
- Choose classic cabinetry with simple Shaker doors and natural wood tones that won’t scream “2024” in five years
- Balance your countertops, appliances, and cabinet finishes so everything works together harmoniously
- Pick durable, low-maintenance materials for high-use surfaces to avoid staining and premature replacement
Your resale value depends on finishes that appeal to mainstream tastes. Skip the bold trendy choices. Instead, invest in classic looks you’ll actually enjoy long-term while keeping future buyers in mind. It’s the smartest approach for avoiding expensive remodels down the road.
Layer Your Lighting for Function and Ambiance

I’ve made the mistake of installing one overhead light and calling it done—your kitchen needs more than that harsh, flat glow. You’ll want to combine task lighting over your countertops and sink, ambient light for the overall room, and accent fixtures to build warmth and character. Getting the right mix of recessed lights, under-cabinet LEDs, and fixture types takes some planning, but testing your bulb compatibility and brightness beforehand means you won’t end up with mismatched colors that’ll frustrate you.
Task Lighting For Workspaces
What’s the single biggest lighting mistake I see in kitchen remodels? Skipping task lighting over your work zones. You’ll regret relying solely on ambient lighting when you’re prepping dinner and can’t see your cutting board distinctly.
Here’s what I’d recommend:
- Install under-cabinet lights with adjustable LED fixtures to illuminate countertops where you actually cook and prep
- Add dimmable fixtures throughout so you can adjust brightness for different times of day
- Choose task lighting that matches your ambient lighting’s color temperature for consistency
I learned this the hard way. Pendant lights over islands look great, but they won’t cut it alone. You need focused light exactly where you’re working. Test your bulb brightness before committing to multiple fixtures. Your future self—frantically chopping vegetables—will appreciate the difference.
Ambient Light And Atmosphere
Now that you’ve got your task lighting sorted, it’s time to think about the bigger picture—literally. I learned the hard way that ambient lighting makes your kitchen functional and welcoming. You’ll want to layer your lighting with overhead fixtures, under-cabinet lighting, and dimmers that work seamlessly together. This combination eliminates harsh shadows and creates flexibility for different moods—bright for cooking, softer for dinner conversations. Install dimmers compatible with LED bulbs to avoid frustrating flicker. Before committing to multiple can lights, test bulb compatibility and color temperature. Mismatched hues throughout your space feel chaotic. A thoughtfully planned layered lighting approach prevents that cold, overly bright kitchen feeling we’ve all experienced. Your space will feel balanced and welcoming.
Fixture Types And Compatibility
Once you’ve mapped out your layered lighting strategy, the real challenge kicks in: choosing fixtures that actually work together. Fixture compatibility isn’t optional—it’s necessary for avoiding frustrating flickering and dim spots that’ll disappoint you.
Here’s what I focus on:
- Test dimmable LEDs with your existing fixtures before committing; some combinations create annoying flicker that disrupts the space
- Match color temperatures across recessed cans, under-cabinet strips, and pendants (2700K ambient, 4000K task) so everything works as planned
- Choose replaceable bulbs over fixed fixtures, giving you flexibility as your kitchen evolves
I always verify that new fixtures play nicely with your current setup. It saves headaches and keeps your lighting scheme cohesive without requiring a complete overhaul down the road.
Chasing Kitchen Design Trends Without Considering Long-Term Durability
I get it—that trendy two-tone cabinet finish or bold jewel-tone paint color looks nice right now, but the point is: what feels fresh today often looks dated in just a few years, and you’ll be stuck with either living with regret or dropping serious cash on another remodel. Instead, I’d suggest anchoring your kitchen in timeless choices like natural wood Shaker cabinets with warm neutrals, then let yourself have fun with trends through smaller items like hardware, backsplash, or decor that you can swap out without major upheaval. This way, you’re not setting yourself up for constant maintenance headaches or the disappointment of watching your “forever kitchen” suddenly feel stuck in 2024.
Trend Versus Timeless Design
When you’re flipping through kitchen magazines or scrolling social media, you’ll spot them everywhere—those gorgeous two-tone cabinets, bold jewel-tone islands, and ultra-modern hardware that catch your eye.
Here’s the thing: trendy finishes fade faster than you’d expect. I learned this the hard way. Instead, consider investing in timeless design choices that won’t leave you regretting your kitchen cabinets in five years.
Think strategically about where trends belong:
- Major elements (cabinets, countertops): stick with neutral palettes and classic Shaker styles
- Mid-range items (backsplash, lighting): blend timeless with subtle current touches
- Accessories (hardware, décor): experiment freely here
Simple choices preserve your resale value and keep your space feeling fresh longer. You’ll appreciate the flexibility to update smaller pieces without gutting your entire kitchen. That’s smart planning.
Maintenance Burden and Regret
How often do you find yourself cleaning fingerprints off your kitchen hardware or worrying about water spots on fancy finishes? I’ve learned that trendy choices like marble countertops or brushed gold fixtures create a real maintenance burden. They demand constant upkeep for spills and acidity, which honestly gets exhausting.
The truth is, prioritizing aesthetics over timeless design leads to regret when styles shift. Custom window treatments become impossible to replace affordably. I recommend choosing durable surfaces instead—quartz outlasts marble, and classic finishes weather years gracefully.
Smart planning includes backups and flexibility. Stock extra cabinet fronts and flooring samples now, before damage happens. This approach reduces future expense and stress. Building in these practical safeguards means your kitchen stays beautiful while preserving your wallet and energy.
Designing Storage Without Knowing What You’ll Store

One of the biggest kitchen remodel mistakes you can make is designing your storage before you’ve actually looked at what you’re storing. I learned this the hard way when my new cabinets didn’t fit my baking supplies or small appliances.
Start with storage planning by inventorying everything you own. Here’s what I’d recommend:
- Count your pots, pans, and utensils to determine drawer and cabinet needs
- List daily use inventory items like spices, canned goods, and cooking tools
- Measure appliances requiring dedicated pantry design space
Your cabinet sizing should match your actual lifestyle, not some imaginary version. If you bake weekly, you’ll need deeper shelves. If you entertain constantly, plan accordingly. This approach prevents expensive regret and lets every inch work for you, not against you.