
I’ll show you how to redo your kitchen while keeping costs down. Start by clearing counters and decluttering—you’ll rediscover items you forgot about. Pick two or three colors for visual harmony, then paint cabinets with budget-friendly primer paint for real impact. Add floating shelves under $30, organize with labeled bins, and swap out hardware for polish. A statement pendant light under $100 brings everything together. Style open shelves with white accents and pieces you love, layering in artwork and textiles for personality. These budget-friendly moves add up into something beautiful—and I’ve got the specific steps to make it happen.
[link-whisper-related-posts]Clear Surfaces and Declutter First

Before you hang a single piece of art or think about paint colors, I’d encourage you to start with what you’ve already got—and figure out what you actually need. When I declutter my surfaces, my kitchen feels calmer. Clearing countertops reveals functional areas I’d forgotten existed, and reducing visual noise helps the whole space feel more open.
Start by removing everything that doesn’t serve a purpose. Group similar items together, then decide what truly belongs in your kitchen. Use decorative containers to conceal what stays, keeping essentials visible but organized. Add a wall shelf to move excess items off counters, instantly creating more prep space.
This foundation matters because a clean slate makes every decorating choice afterward deliberate and purposeful.
Pick Two or Three Colors for Cohesion

I’ve found that picking just two or three colors keeps a kitchen organized and deliberate, and it’s honestly easier than you’d think. You’ll want one dominant color (like soft white or warm gray for your walls), an accent color for statement pieces like a painted dresser or open shelving, and maybe a third pop of color in accessories like mugs or storage bins to tie everything together. This approach maintains visual harmony while letting your personality come through without overwhelming the space.
Color Selection Strategy
Why do some kitchens feel perfectly balanced while others leave you feeling visually exhausted? The answer is straightforward: a smart color strategy. I’ve learned that picking two or three cohesive colors makes a real difference. Your cabinets deserve the starring role—choose your dominant color there. Then, select an accent color for smaller touches like bar stools or artwork. Add a complementary third color through cushions or small appliances for depth.
| Surface | Color Role | Example |
|---|---|---|
| Cabinets | Dominant | Soft white |
| Countertops | Secondary | Gray marble |
| Walls | Accent | Warm cream |
| Hardware | Metallic Tone | Brushed gold |
| Accessories | Complementary | Sage green |
Testing swatches on your actual walls prevents expensive mistakes. You’re building a kitchen that’s thoughtfully designed, not randomly assembled.
Maintaining Visual Harmony
Now that you’ve got your dominant color locked in place, it’s time to make sure everything works together without feeling chaotic. I stick to two or three colors maximum—it’s honestly easier than overthinking it. I apply my main color to larger surfaces like walls or my kitchen island, then pick a secondary color for hardware, textiles, and small decor pieces. This approach creates visual harmony without the overwhelming clutter that comes from too many competing hues.
Here’s my trick: I balance bold kitchen decor choices with neutrals like white, gray, or natural wood. This keeps surfaces feeling clean and organized. I also limit metallic finishes to one tone—either matte brass or brushed nickel—because mixing them disrupts that cohesive feel I’m working toward. The result? A kitchen that feels purposeful and distinctly mine.
Paint Cabinets Under $50 for Maximum Impact

Want to completely redo your kitchen without spending thousands on new cabinetry? Painting your cabinets delivers major visual impact for minimal investment. Here’s how to tackle it: grab premium self-priming paint like Ovation Interior Latex Paint (around $39.98 per gallon) and you’re already ahead. Start by removing hardware, labeling everything so reinstallation’s straightforward. Sand surfaces thoroughly, then clean away dust. Apply two to three coats, letting each dry completely. The result? You’ll create a strong focal point that complements your countertops without overwhelming the space with competing colors. Plus color coordination matters—choose hues that enhance rather than clash with existing elements. This cost-effective approach turns tired cabinets into kitchen centerpieces, proving significant style doesn’t require significant spending.
Add Affordable Shelving to Free Up Counter Space

If your kitchen counters are drowning in appliances and clutter, wall-mounted shelves might be exactly what you need to reclaim that precious surface space. I’ve found that open shelving adds storage space affordably.
Floating shelf kits cost little—often under $30—and installation takes just an afternoon. Here’s what I’d organize on my new shelves:
Floating shelf kits cost under $30 and install in an afternoon—perfect for organizing your kitchen with style and function.
- Coffee mugs and favorite cups for daily access
- Spice jars in matching containers for visual appeal
- Small appliances I use frequently, like my blender
- Cookbooks and decorative pieces for personality
The benefit? Grouping items by function reduces clutter instantly. I position frequently used things at eye level, keeping my workflow smooth without sacrificing aesthetics. Those decorative containers I mentioned? They conceal chaos while maintaining a unified appearance.
Organize With Labeled Bins and Grouped Items

Those floating shelves look great, but here’s the thing—pretty shelving won’t help much if you can’t find what you need. That’s where labeled bins organize your kitchen from chaotic to functional.
I group similar items together—baking supplies in one bin, snacks in another, tea and coffee accessories grouped separately. This method saves me time and frustration. Then I grab chalkboard labels and a white marker to identify each bin clearly. You could also use printable stickers for a polished look.
When everything has its designated spot, your kitchen stays functional and organized. Your family knows where to find things without asking you. Plus, those wipe-clean containers conceal clutter while keeping your shelves looking neat and organized. It’s kitchen organization that actually works.
Introduce a Coffee Station or Functional Zone

You can set up a dedicated coffee station in a corner of your kitchen that streamlines your morning routine and organizes your space. Designate a specific area—perhaps a dresser or cabinet with a shelf above—where you group your machine, mugs, and supplies together so everything you need is within arm’s reach. By styling this zone with purposeful pieces like matching hardware and complementary finishes, you’ll create a functional spot with considered design choices.
Designate Your Coffee Corner
Ever notice how your kitchen feels more organized when everything’s got a home? That’s exactly what designating a coffee corner does for your space. I love claiming one end of my countertop or a small wall zone exclusively for coffee tasks. It keeps your kitchen storage neat by grouping everything together:
- Coffee machine and carafe in the center
- Mugs hanging on hooks nearby
- Filters and beans in matching containers
- Wall shelf above for quick access
I use a dresser or cabinet as my focal point, styling it with colors that contrast against surrounding cabinets. This visual difference clearly marks your coffee corner from other zones, making it feel purposeful and welcoming. When guests see your dedicated space, they know right away where to grab their morning brew. That’s what thoughtful organization does for your home.
Organize Supplies By Function
What makes a kitchen work well? Organization by function. I’ve learned that grouping coffee supplies by how I use them improves my mornings.
I store my brewing essentials—machine, filters, pods—in one labeled basket. My serving items, like mugs and carafes, go in another. Cleaning supplies get their own container nearby. This system reduces decision fatigue.
| Category | Items | Container |
|---|---|---|
| Brewing | Filters, pods, grounds | Labeled basket |
| Serving | Mugs, carafe, spoons | Open shelf |
| Cleaning | Cloths, descaler | Compact caddy |
| Extras | Backup pods, seasonal mugs | Upper cabinet |
| Daily Use | Favorite mug, active carafe | Arm’s reach |
Keeping frequently used items within arm’s reach while storing extras higher up keeps your counter clear. This storage and organization strategy makes your coffee station organized and functional. You’ll notice the difference right away.
Style With Purposeful Pieces
How’s your kitchen looking now that everything’s organized by function? It’s time to style those storage solutions with pieces that matter to you.
Consider creating a dedicated coffee station as your main feature. Here’s what makes a basic setup work well:
- Repurpose an old dresser or cabinet as your anchor piece
- Add matching hardware and coordinating color accents throughout
- Install open shelves above to display mugs and accessories
- Group frequently used items within arm’s reach for efficiency
Choose finishes that complement your existing cabinets and countertops. This prevents your kitchen from feeling cluttered with competing colors. When your coffee station matches your taste, you’re not just organizing—you’re building a welcoming space that feels like you. That’s decoration done right.
Choose One Statement Pendant Light Under $100

One pendant light can improve your kitchen noticeably. A single fixture over your island or peninsula provides practical illumination and visual interest. Consider midcentury-modern globe styles—they pair well with most decor schemes. Look for pendant lighting under $100 at retailers like Lamps Plus, particularly in their sale sections. Match the fixture’s finish to your existing metals and hardware for a cohesive appearance. Position your pendant so light directs downward toward your work surface, not into your eyes. You’ll achieve a well-designed look while staying within budget.
Style Shelves With Curated Pieces and White Accents

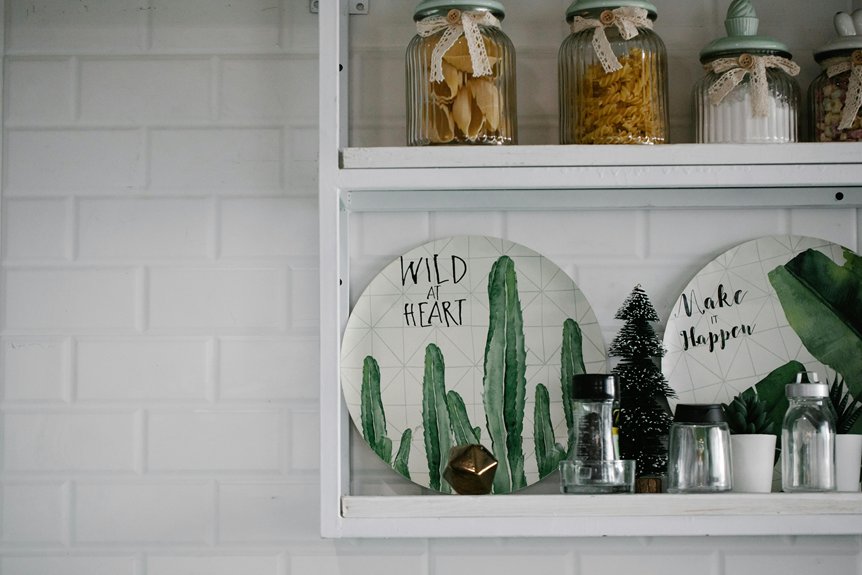
Your open shelves are prime real estate for showing off your style, and mixing everyday items with intentional white accents—like ceramic canisters or matte frames—creates a cohesive appearance. When you group similar pieces by function, say coffee mugs together or drinking glasses in one section, you’ll find what you need faster while keeping visual clutter minimal. The approach is balancing the practical items you use daily with a few decorative touches, all while letting white tones tie everything together and brighten your whole kitchen.
Curate Strategic Display Items
Why do some kitchen shelves look so organized while others feel chaotic? The answer is mixing function with beauty strategically. Thoughtful display shelves create a space where you want to spend time.
Start by selecting pieces that tell your story:
- Coffee mugs paired with coffee-themed decor
- White ceramic canisters holding everyday items
- Framed art in matching frames
- Clear glassware grouped together
Limit yourself to 4–6 items per shelf—I know it’s tempting to fill every space, but restraint creates the organized look you’re after. Stick with consistent metal finishes like brushed nickel throughout. When you group items by function and purpose, your display shelves look planned rather than random.
Incorporate White Contrast Elements
While organized shelves create that polished look we talked about, white contrast elements bring dimension to your kitchen display. I’ve found that strategically placing white ceramic pieces against darker backdrops creates visual pop that draws the eye. Try pairing crisp white mugs and vases with black shelving or wood accents—the contrast makes your choices clear and deliberate.
Here’s my approach: I arrange functional items like glass jars alongside decorative pieces, keeping the finish language consistent with matching metal hardware and frames. Adding soft, warm lighting above these displays improves visibility without overwhelming the space.
The key is being selective. A few high-contrast white pieces scattered across your shelves prevent clutter while building a kitchen that feels organized and considered. You’re not just decorating; you’re creating a kitchen that works for how you actually live.
Balance Function With Aesthetics
How do you keep kitchen shelves both beautiful and practical? I’ve learned that mixing everyday tools with decorative pieces creates the perfect balance. Your storage display becomes functional art when you’re deliberate about placement.
Here’s my approach:
- Group similar items—measuring cups with spice jars, mixing bowls together
- Add white ceramics or framed prints between practical tools
- Match your cabinet hardware finish to shelf accessories (brass with brass, chrome with chrome)
- Limit decor to three well-chosen pieces per shelf
This strategy means I grab what I need instantly while enjoying an organized look. When everything coordinates, even my everyday measuring spoons feel purposeful. You’re not sacrificing function for beauty or vice versa—you’re creating shelves that work as hard as you do.
Layer Personality Through Artwork and Textiles
If you’ve ever walked into a kitchen that felt sterile and blank, you know exactly what I’m talking about—it’s missing *you*. I’ve learned that layering personality through artwork and textiles makes a space one where you actually want to spend time.
I start by choosing a cohesive color palette—say, warm neutrals with sage green accents. Then I grab affordable Etsy prints under $5, frame them in an IKEA RIBBA frame, and arrange them above my coffee bar. Simultaneously, I layer textiles: a linen dish towel, throw pillows, and a small rug in matching tones.
| Location | Item | Color | Purpose |
|---|---|---|---|
| Wall | Artwork | Sage | Visual anchor |
| Counter | Towel | Cream | Function + texture |
| Chair | Cushion | Sage | Comfort + cohesion |
| Floor | Rug | Cream | Grounding element |
This balanced approach creates genuine warmth without clutter.
Swap Hardware and Finishes as the Final Touch

Ever notice how swapping out cabinet knobs can change a kitchen’s appearance? I’ve found that updating hardware and finishes is a budget-friendly final touch worth considering.
Swapping cabinet knobs is a budget-friendly way to completely transform your kitchen’s appearance and polish.
Here’s my approach to this update:
- Select finishes like matte black, brass, or champagne bronze that coordinate with your cabinet color
- Number all doors and drawers before starting replacements to maintain consistent spacing
- Match your hardware finish to your faucet for coordinated metal tones throughout the space
- Pair new hardware with subtle lighting or a bold accent like a colored dresser
This simple swap delivers noticeable impact. You’re giving your kitchen a polished, deliberate look without major expense. I’ve found that these small details make your space feel designed with care, and that matters.