No, I’d skip decorator’s caulk in your bathroom. While it’s flexible and paintable, it’ll crumble within months once moisture hits it. The acrylic binder softens and breaks down in humid environments, inviting mold and water damage behind your walls.
Silicone sealants resist moisture much better and stay flexible through temperature swings. They cost more upfront, but the investment pays off by preventing expensive repairs down the road. Want to know exactly how to prep surfaces and apply the right sealant?
[link-whisper-related-posts]Decorator’s Caulk vs. Bathroom Sealant: What’s the Difference?

Why does it matter which caulk you grab from the shelf? Well, I’ll tell you—using the wrong product in your bathroom can lead to moisture problems and mold growth down the line.
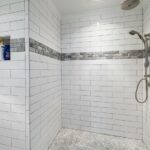
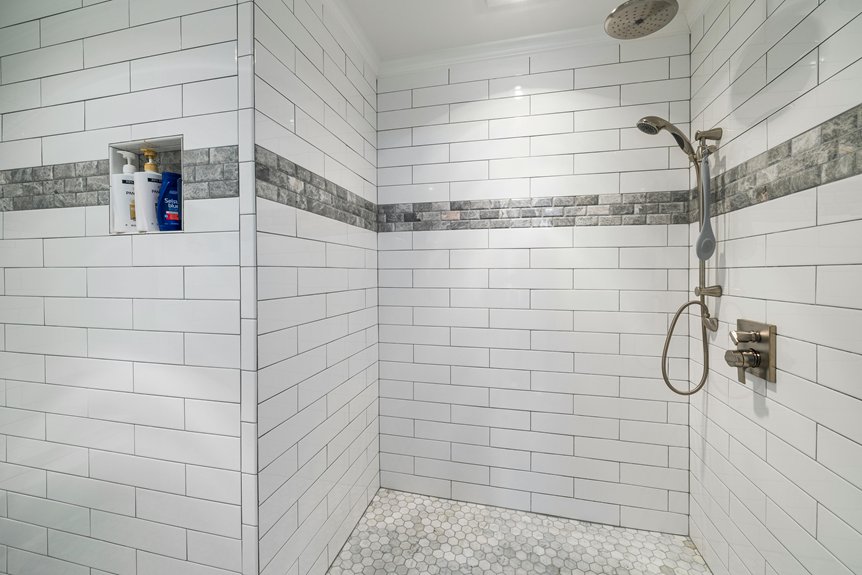
Decorator’s caulk is an acrylic filler that’s flexible enough for gaps but dries less pliable than true sealants. Bathroom sealant, on the other hand, uses silicone and delivers superior moisture-resistance. Here’s the key difference: decorator’s caulk works great between skirting boards and furniture, but bathroom sealant handles tubs, showers, and tiled areas where water constantly splashes.
Silicone-based bathroom sealants resist water better and resist mold growth better. Decorator’s caulk, while paintable and great for color matching, doesn’t handle ongoing expansion and moisture like bathroom sealant does. Select the right product, and you’ll get lasting results.
How Moisture Breaks Down Acrylic Caulk

Now that you understand why bathroom sealant outperforms decorator’s caulk in wet areas, let’s look at what actually happens when moisture gets into acrylic caulk over time.
| Stage | Timeline | What Happens |
|---|---|---|
| Initial exposure | Days 1–7 | Water penetrates the caulk surface |
| Breakdown begins | Weeks 2–4 | Acrylic binder softens and weakens |
| Failure | Months 2–3 | Caulk crumbles, gaps reappear |
Bathroom moisture causes acrylic caulk breakdown because water attacks the binder holding particles together. Unlike true sealants designed for shower moisture tolerance, decorator’s caulk isn’t formulated to resist constant dampness. The flexible material gradually loses its grip on walls, creating gaps where mold loves to hide. You’ll notice peeling, crumbling, or separation from surfaces—particularly around tubs and showers where humidity peaks. That’s why professionals recommend sealants specifically engineered for wet environments instead.
Silicone: The Better Bathroom Choice

Since decorator’s caulk crumbles under bathroom moisture, it’s time to upgrade to silicone sealant—the practical choice for wet spaces. Silicone sealant offers superior moisture resistance, which means your bathroom stays sealed and protected from water damage. Unlike acrylic alternatives, silicone performs well in damp environments where decorator’s caulk fails.
When you’re shopping, grab sanitary silicone specifically designed for bathrooms and kitchens. Dow Corning sanitary silicone is a trusted option that resists mold and mildew. MAPESIL SOLVENT-FREE works well too if you need color matching.
Here’s why this matters: silicone stays flexible even when moisture constantly batters your walls and fixtures. That flexibility prevents cracking and keeps water out over time. You’re investing in durability that lasts longer than other options.
Prep Your Bathroom for Caulking

Before you apply decorator’s caulk, make sure your bathroom surfaces are clean—dirt and soap scum will affect how well the caulk adheres. Next, scrape out any old caulk from those gaps, which takes patience but prevents problems later. Once everything is dry and you’ve inspected those spaces to see what you’re working with, you’re ready to proceed.
Clean Surfaces Thoroughly First
First, I remove any old silicone sealant or existing caulk from the gap using a caulk removal tool. Next, I wipe everything down with a mild cleaner and rinse thoroughly to eliminate soap residues that interfere with bonding. For stubborn grime, isopropyl alcohol works well.
Once surfaces dry completely—and I mean fully dry—I apply masking tape along edges to create clean lines. This surface preparation step prevents messy overflow and allows your decorator’s caulk to adhere properly, giving you professional results that last.
Remove Old Caulk Completely
Why does old caulk matter so much? Because it’s your foundation for success. You need to remove old caulk completely before you apply new silicone caulk. Any leftover material prevents proper adhesion and compromises moisture resistance, which defeats the whole purpose of recaulking.
Here’s what I do: I scrape away the deteriorating caulk using a caulk removal tool or utility knife, working carefully along the edges. Then I vacuum up dust and wipe everything down thoroughly. This step takes patience, but it’s worth the effort.
Once you’ve got a clean, dry surface, your new silicone caulk will bond properly and resist moisture far better. You’re setting yourself up for a lasting seal that’ll protect your bathroom for years.
Dry And Inspect Gaps
Once your old caulk is completely gone and your surfaces are clean, the next critical step is letting everything dry out completely—and I mean *completely*. I’ve learned this the hard way. Moisture trapped behind fresh caulk creates problems later, so give your bathroom gaps at least 24 hours to air dry.
While waiting, inspect those spaces carefully. Look for any remaining debris, dust, or moisture lingering in the crevices. Run your finger along each gap—it should feel bone dry and smooth.
Here’s where honesty matters: if you’re dealing with moisture-prone bathroom gaps, consider whether a silicone sealant might serve you better than decorator’s caulk. Silicone offers superior moisture resistance and durability in wet environments. This decision matters before you apply anything.
How to Apply Caulk Around Tubs and Tiles

When you’re looking at those gaps around your bathtub or tile edges, you’ve probably wondered whether decorator’s caulk will actually do the job—and here’s the honest answer: it’ll work in a pinch for some areas, but silicone sealant is really your best bet for moisture-heavy spots.
Decorator’s caulk works in a pinch, but silicone sealant is really your best bet for moisture-heavy bathroom spots.
Here’s what I recommend for tackling bathroom gaps:
- Choose high-grade, sanitary silicone sealant specifically designed for wet areas
- Apply silicone around tubs and tiles where water exposure is constant
- Reserve decorator’s caulk for non-moisture-prone gaps only
- Avoid quick-dry “decorator’s” formulations in bathrooms
The truth is, decorator’s caulk lacks the flexibility silicone offers. Water will eventually seep behind it, causing problems. I’ve learned that spending a bit extra on quality silicone prevents costly repairs later. Your bathroom deserves protection that actually lasts.
Proper Curing Prevents Cracking and Mildew

Proper Curing Prevents Cracking and Mildew
Proper curing time is absolutely essential because it’s the difference between caulk that holds strong and caulk that cracks and invites mildew into your bathroom. You’ll want to give your decorator’s caulk adequate time to set properly. Here’s what works best:
| Stage | Time Required |
|---|---|
| Initial set | 1–2 hours |
| Full cure | Up to 24 hours |
| Before moisture exposure | 24 hours minimum |
| Silicone sealant cure | 24–48 hours |
| Ventilation importance | Throughout process |
During curing, keep your bathroom well-ventilated and maintain a dry environment. This prevents mildew growth and strengthens moisture resistance. While decorator’s caulk works temporarily, silicone sealant is the better choice for bathrooms due to its superior performance and durability.
Will Paint Stick to Bathroom Caulk?

Does paint actually adhere to bathroom caulk, or will your fresh coat just peel away? I’ve found that decorator’s caulk handles paint beautifully once it’s fully cured. Here’s what affects adhesion:
- Curing time matters: Wait the full 24 hours before painting for best adhesion
- Clean surfaces first: Wipe away dust so paint bonds properly to your bathroom sealing
- Use quality primer: This helps paint stick to decorator’s caulk more effectively
- Choose bathroom-safe paint: Moisture-resistant formulas work best in humid spaces
The real catch? Silicone sealants won’t accept paint well, so stick with decorator’s caulk if you’re planning to paint. Proper preparation is the key difference between paint that holds and paint that disappoints.
Mistakes That Kill Bathroom Caulk

Although decorator’s caulk seems like an inexpensive solution for bathroom gaps, I’ve learned the hard way that it’s actually prone to failure in moist environments. The biggest mistake I made was ignoring moisture exposure. Bathroom humidity causes decorator’s caulk to crack and deteriorate far faster than expected.
I’ve also discovered that improper curing spells disaster. You need adequate drying time before exposing the caulk to water. Rushing this step guarantees failure within months.
Here’s what I wish I’d known earlier: moisture-prone areas demand superior products. Skip decorator’s caulk entirely in bathrooms. Instead, invest in high-grade silicone sealant, which resists moisture effectively. Yes, it costs more upfront, but you’ll avoid frustrating replacements later. Your future self will benefit from choosing the right product from the start.
Why Sanitary Silicone Beats Decorator’s Caulk Every Time

I’ve learned the hard way that sanitary silicone outperforms decorator’s caulk when it comes to moisture resistance and durability—it’s simply engineered to handle bathrooms’ wet, steamy conditions without cracking or peeling like acrylic caulk does. What really impressed me is how sanitary silicone stays flexible in those temperature swings and humidity spikes your bathroom throws at it, while decorator’s caulk gets brittle and fails too fast. Plus, sanitary silicone actively resists mold growth, which means you’re protecting your bathroom from those nasty black spots that wreck both your seals and your peace of mind.
Moisture Resistance And Durability
when moisture gets involved, your caulk choice matters.
Decorator’s caulk simply can’t handle what your bathroom throws at it. I’ve watched it crack and pull away as humidity and temperature shift. Sanitary silicone, though? That works for moisture resistance and durability.
Here’s why I recommend sanitary silicone:
- Creates a one-piece, waterproof seal that stays flexible
- Resists mold and mildew better than acrylic alternatives
- Won’t shrink or degrade in damp conditions
- Maintains integrity around tubs, showers, and wet walls for years
Products like MAPESIL SOLVENT-FREE even give you color-matching options with reduced odor. You’re getting professional-grade protection that actually lasts. Your bathroom needs sealant that won’t fail when things get wet.
Flexibility In Wet Environments
It cracks. That acrylic filler just can’t handle the constant moisture and temperature swings your bathroom throws at it. I’ve watched it shrink and split within months.
Sanitary silicone, though? That’s built differently. It maintains elasticity over time, stretching and contracting with your bathroom’s natural movement without losing its grip. This flexibility means it won’t fail when moisture seeps in or humidity spikes.
Think of it this way: decorator’s caulk is brittle, while sanitary silicone stays supple. That elasticity protects your tiles, tub, and shower areas from water damage. You’re not just sealing gaps—you’re creating a durable, watertight barrier that adapts to wet environments. That’s the difference between a temporary solution and one that lasts.
Mold Prevention For Bathrooms
Because bathrooms are basically mold’s favorite playground, you need caulk that actually fights back—and decorator’s caulk just doesn’t cut it.
Here’s the real deal: decorator’s caulk is flexible acrylic that deteriorates when moisture hits it. I’ve watched it crack and fail within months. Sanitary silicone, though? It’s specifically formulated for wet environments and provides serious mold resistance that lasts.
What makes sanitary silicone your bathroom’s best friend:
- Creates waterproof seals that stop moisture from sneaking behind tiles
- Resists mold and mildew growth naturally
- Stays flexible without cracking or peeling
- Handles humidity and temperature swings like a champ
The secret to success? Prep matters. Clean surfaces, remove soap scum, let everything dry completely. When you pair proper prep with quality bathroom sealant, you’re protecting your space. Your future self will thank you for choosing sanitary silicone over decorator’s caulk.
When to Hire a Pro Instead of DIY

Should you grab your caulking gun and tackle those bathroom gaps yourself, or is this the moment to call in someone with experience? I’ve learned that hiring a pro matters more in moisture-prone areas than you’d think. If you’re working with sanitary silicone sealant around your tub or shower, professionals know exactly how to prep surfaces, apply even beads, and allow proper curing. They’ve handled countless bathrooms and understand movement patterns that protect against mold. You’ll save yourself frustration and potential water damage. Consider getting professional help if your gaps are wide, oddly shaped, or in high-moisture zones. Sometimes paying for expertise upfront prevents costly repairs later. It’s not about admitting defeat—it’s about choosing the right tool for the job.
Which Caulks Actually Stop Mold From Growing

What’s the difference between a caulk that keeps mold at bay and one that practically invites it to grow? It’s all about the formula.
Standard decorator’s caulk lacks mold inhibitors, making it vulnerable in damp spaces. Instead, choose a silicone sealant specifically labeled mold-resistant or designed for sanitary environments. These bathroom caulk products contain fungicidal properties that actively fight mildew.
Here’s what separates winners from losers:
- Sanitary silicones include built-in mold inhibitors
- Acetoxy-free options reduce that vinegar smell while resisting mold
- Proper surface prep matters as much as the product itself
- Moisture-prone areas demand mold-resistant formulations
Even the best silicone sealant fails if you skip cleaning or preparation. Invest in quality bathroom caulk, prepare surfaces thoroughly, and you’ll win the mold battle before it starts.
Remove Old Caulk (The Essential First Step)

Remove Old Caulk (The Essential First Step)
Now that you’ve picked out your mold-fighting silicone, you can’t just apply it over whatever’s already there—that old, cracked caulk will sabotage your whole project. Caulking removal requires attention to detail, but it’s necessary for a successful outcome.
Here’s what I do: I grab a utility knife and carefully cut along the edges of the old silicone, then lift it away. For stubborn spots, a caulk remover softens things up nicely. Once that bathroom sealant removal is complete, I scrub the joint clean with a damp cloth.
Let everything dry completely—moisture trapped underneath causes problems later. It takes patience, but removing old caulk properly gives your new sealant the clean surface it needs to stick around and actually protect your bathroom.
Is Premium Silicone Worth the Extra Cost?

I used to skip the premium silicone and grab whatever decorator’s caulk was cheapest, thinking I’d save a few bucks—but that decision cost me way more in the long run.
Premium silicone sealants deliver better value. Here’s why you’ll want to invest:
- Moisture resistance keeps your bathroom protected longer, preventing mold and water damage
- Flexibility means fewer cracks that demand constant recaulking
- Color-matching options like solvent-free varieties in cream and off-white blend with your space
- Durability of brands like MAPESIL SOLVENT-FREE outlasts decorator’s caulk by years
Yes, premium options cost more upfront. But you’re avoiding repeat work, bathroom repairs, and frustration. When I switched to quality silicone, my bathroom stayed sealed and protected. That’s the kind of peace of mind worth the investment.
What Happens If Your Caulk Fails?

When decorator’s caulk deteriorates in your bathroom, you’re looking at a cascade of problems that’ll frustrate you far more than the initial caulking job. You’ll notice cracking and peeling as moisture wins the battle against this weak material. Gaps reappear between your tiles and walls, inviting water behind surfaces where it shouldn’t be. Mold growth follows quickly, creating health concerns nobody wants. Here’s the thing: bathroom failures with decorator’s caulk happen because it simply wasn’t designed for constant damp environments. That’s why silicone sealants exist—they’re built to handle moisture. When you finally reseal with proper silicone sealants, you’ll appreciate the difference. Learning this lesson teaches us that choosing the right product upfront saves headaches, money, and mold troubles down the road.
Honest Talk: When DIY Won’t Work

Look, I’ll be honest with you—if you’ve already got water damage creeping up your bathroom walls or mold forming behind your tiles, decorator’s caulk won’t save you, and neither will a DIY patch job. The moisture has likely compromised the area beyond what a flexible acrylic filler can handle, which means you’re probably looking at professional help to fix the root problem before anything else goes wrong. Sometimes calling in an expert isn’t giving up; it’s actually the smartest move you can make for your bathroom’s long-term health.
Moisture Damage Risks
Why does decorators caulk fail so spectacularly in bathrooms? I’ll be honest—it’s because moisture resistance is basically non-existent with acrylic fillers. You’re setting yourself up for trouble when you expose decorators caulk to constant humidity.
Here’s what happens:
- Cracking starts fast. Seasonal movement and moisture cause splits within months, not years
- Water sneaks through. Unlike silicone sealants, decorators caulk can’t create a waterproof barrier around tubs or showers
- Mold loves it. Moisture damage accelerates when water penetrates behind the caulk
- Repairs multiply. You’ll recaulk repeatedly, wasting time and money
Bathroom moisture damage isn’t something decorators caulk handles well. The low flexibility means it can’t move with your walls. Silicone sealants or modified silicone options provide durability that lasts longer. This is one DIY shortcut that will cost you down the line.
Professional Intervention Needed
At this point, you’ve probably realized that decorator’s caulk isn’t your bathroom’s answer—and honestly, that’s when you should stop and call a pro.
Here’s the thing: if you’ve already applied decorator’s caulk around your tub or shower, a professional can assess the damage and recommend proper bathroom sealants instead. They’ll remove the failing caulk, prepare surfaces correctly, and apply sanitary-grade silicone that actually delivers moisture resistance.
I know calling someone costs more upfront, but think of it as protecting your walls from water damage that’ll cost significantly more later. Professionals have the tools, experience, and right products—like quality silicone sealants—to do this job properly.
Your bathroom needs more than DIY fixes that’ll crack within months. Sometimes admitting we need help is the right choice.